How to change a string like a pro.
It happens to every player, a string needs replacing, but how do you put on a new string
(or the whole set even?) without needing a trip to your local Violin Trade Professional?
In this article I will take you through the steps of replacing one string or a whole set and I will tell you a few tips and tricks that have helped me over the years. A second post will bring answers to questions about strings you didn’t know you had, like: When is it time to replace a string? String flow, what is it and why is it important? How often do you change strings? Why are there so many different variations? Finally… Ball-end or loop-end?
“Ground rules”
If you would like to replace the whole set,
please NEVER EVER EVER NEVER take them all off at once!
Releasing the pressure completely will move the bridge away from its precisely allocated position and it often can topple the soundpost.
And then it’s a trip to your violin doctor I’m afraid.
Instead, to replace a whole set, you should do them two-by two.
It’s easiest to do them side by side, beginning with the bass side (G and D for Violin, C and G for Viola and Cello).
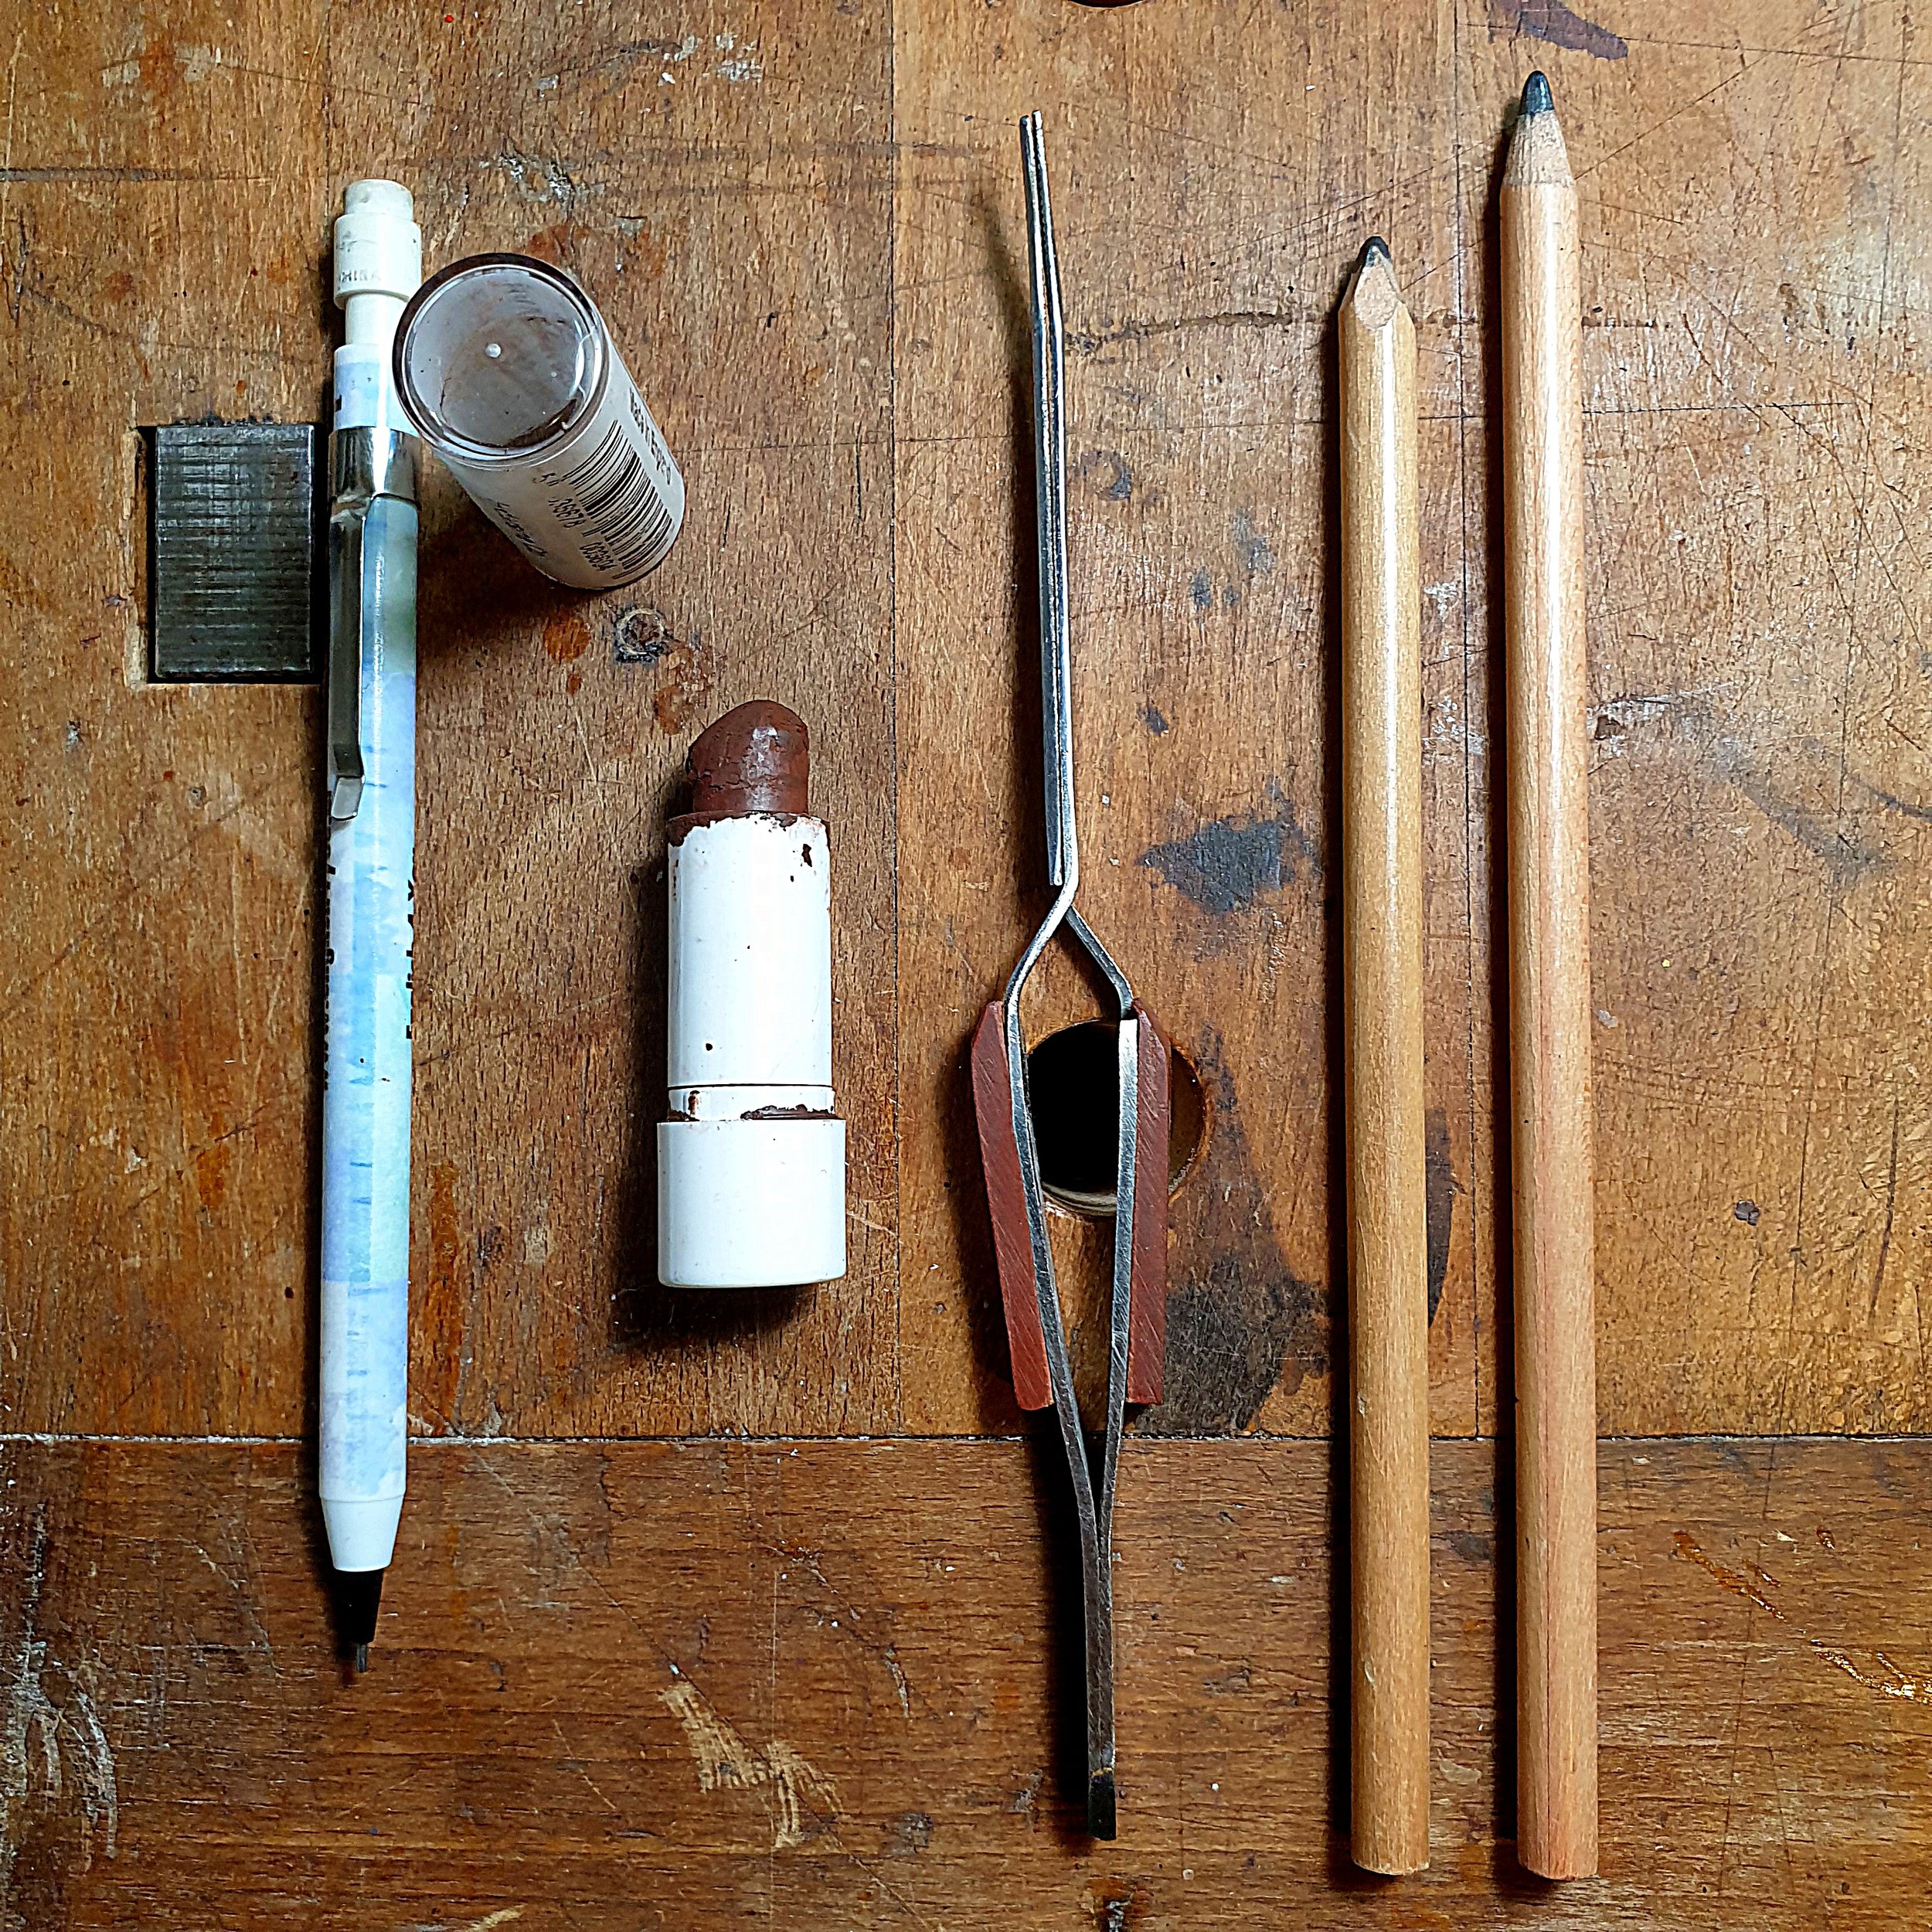
“Ingredients”
- New strings of your chosen flavour
- (Mechanical) pencil
- W. E. Hill and Sons Peg Paste
- Non-sharp DIY-tweezers (handy to have on hand)
- A tuning app on your phone. I personally use the app called ‘gStrings’ as it has an old-school-analogue-style measuring dial.
(I am not affiliated with this app, the producers or developers and I will not receive any financial gain by recommending it to you).


“To change something, first you need to release it.”
If you have tailpiece adjusters or fine tuners, do turn them out to the point where they do not grip any further –
you will feel the place where the pressure just falls away.
Carefully release the tension on all string(s) that are to be replaced a semitone, then remove up to two strings completely from the peg.
Take care that the sharp points do not sting you, as they can hurt.
“Zero-grip Graphite”
Grab a normal pencil with a thin point (a mechanical pencil works best in my experience for violin, for cello the graphite point can be wider).
Now, run your pencil a few times through the little slots (or string grooves) up at the topnut and the bridge. It is easiest to keep your position of you rest a finger on the fingerboard or bridge itself. This anchors your position and you have less chance of ‘colouring outside the lines’ ;)
“Why should I bother?”
The purpose of the graphite is to add a smooth ‘lubricant’ to the places where the string touches the violin. The pencil allows the string to move easier over the wood when tuning (at either end of the string). Think of it as engine oil to reduce friction of the moving parts inside your car engine.
A happily flowing string means a singing string! Graphite also adds longevity to your string’s life as the friction on to the wood is reduced. A long living string means more pennies in your pocket! The pictures are of a cello, just because it is bigger and easily photographed.

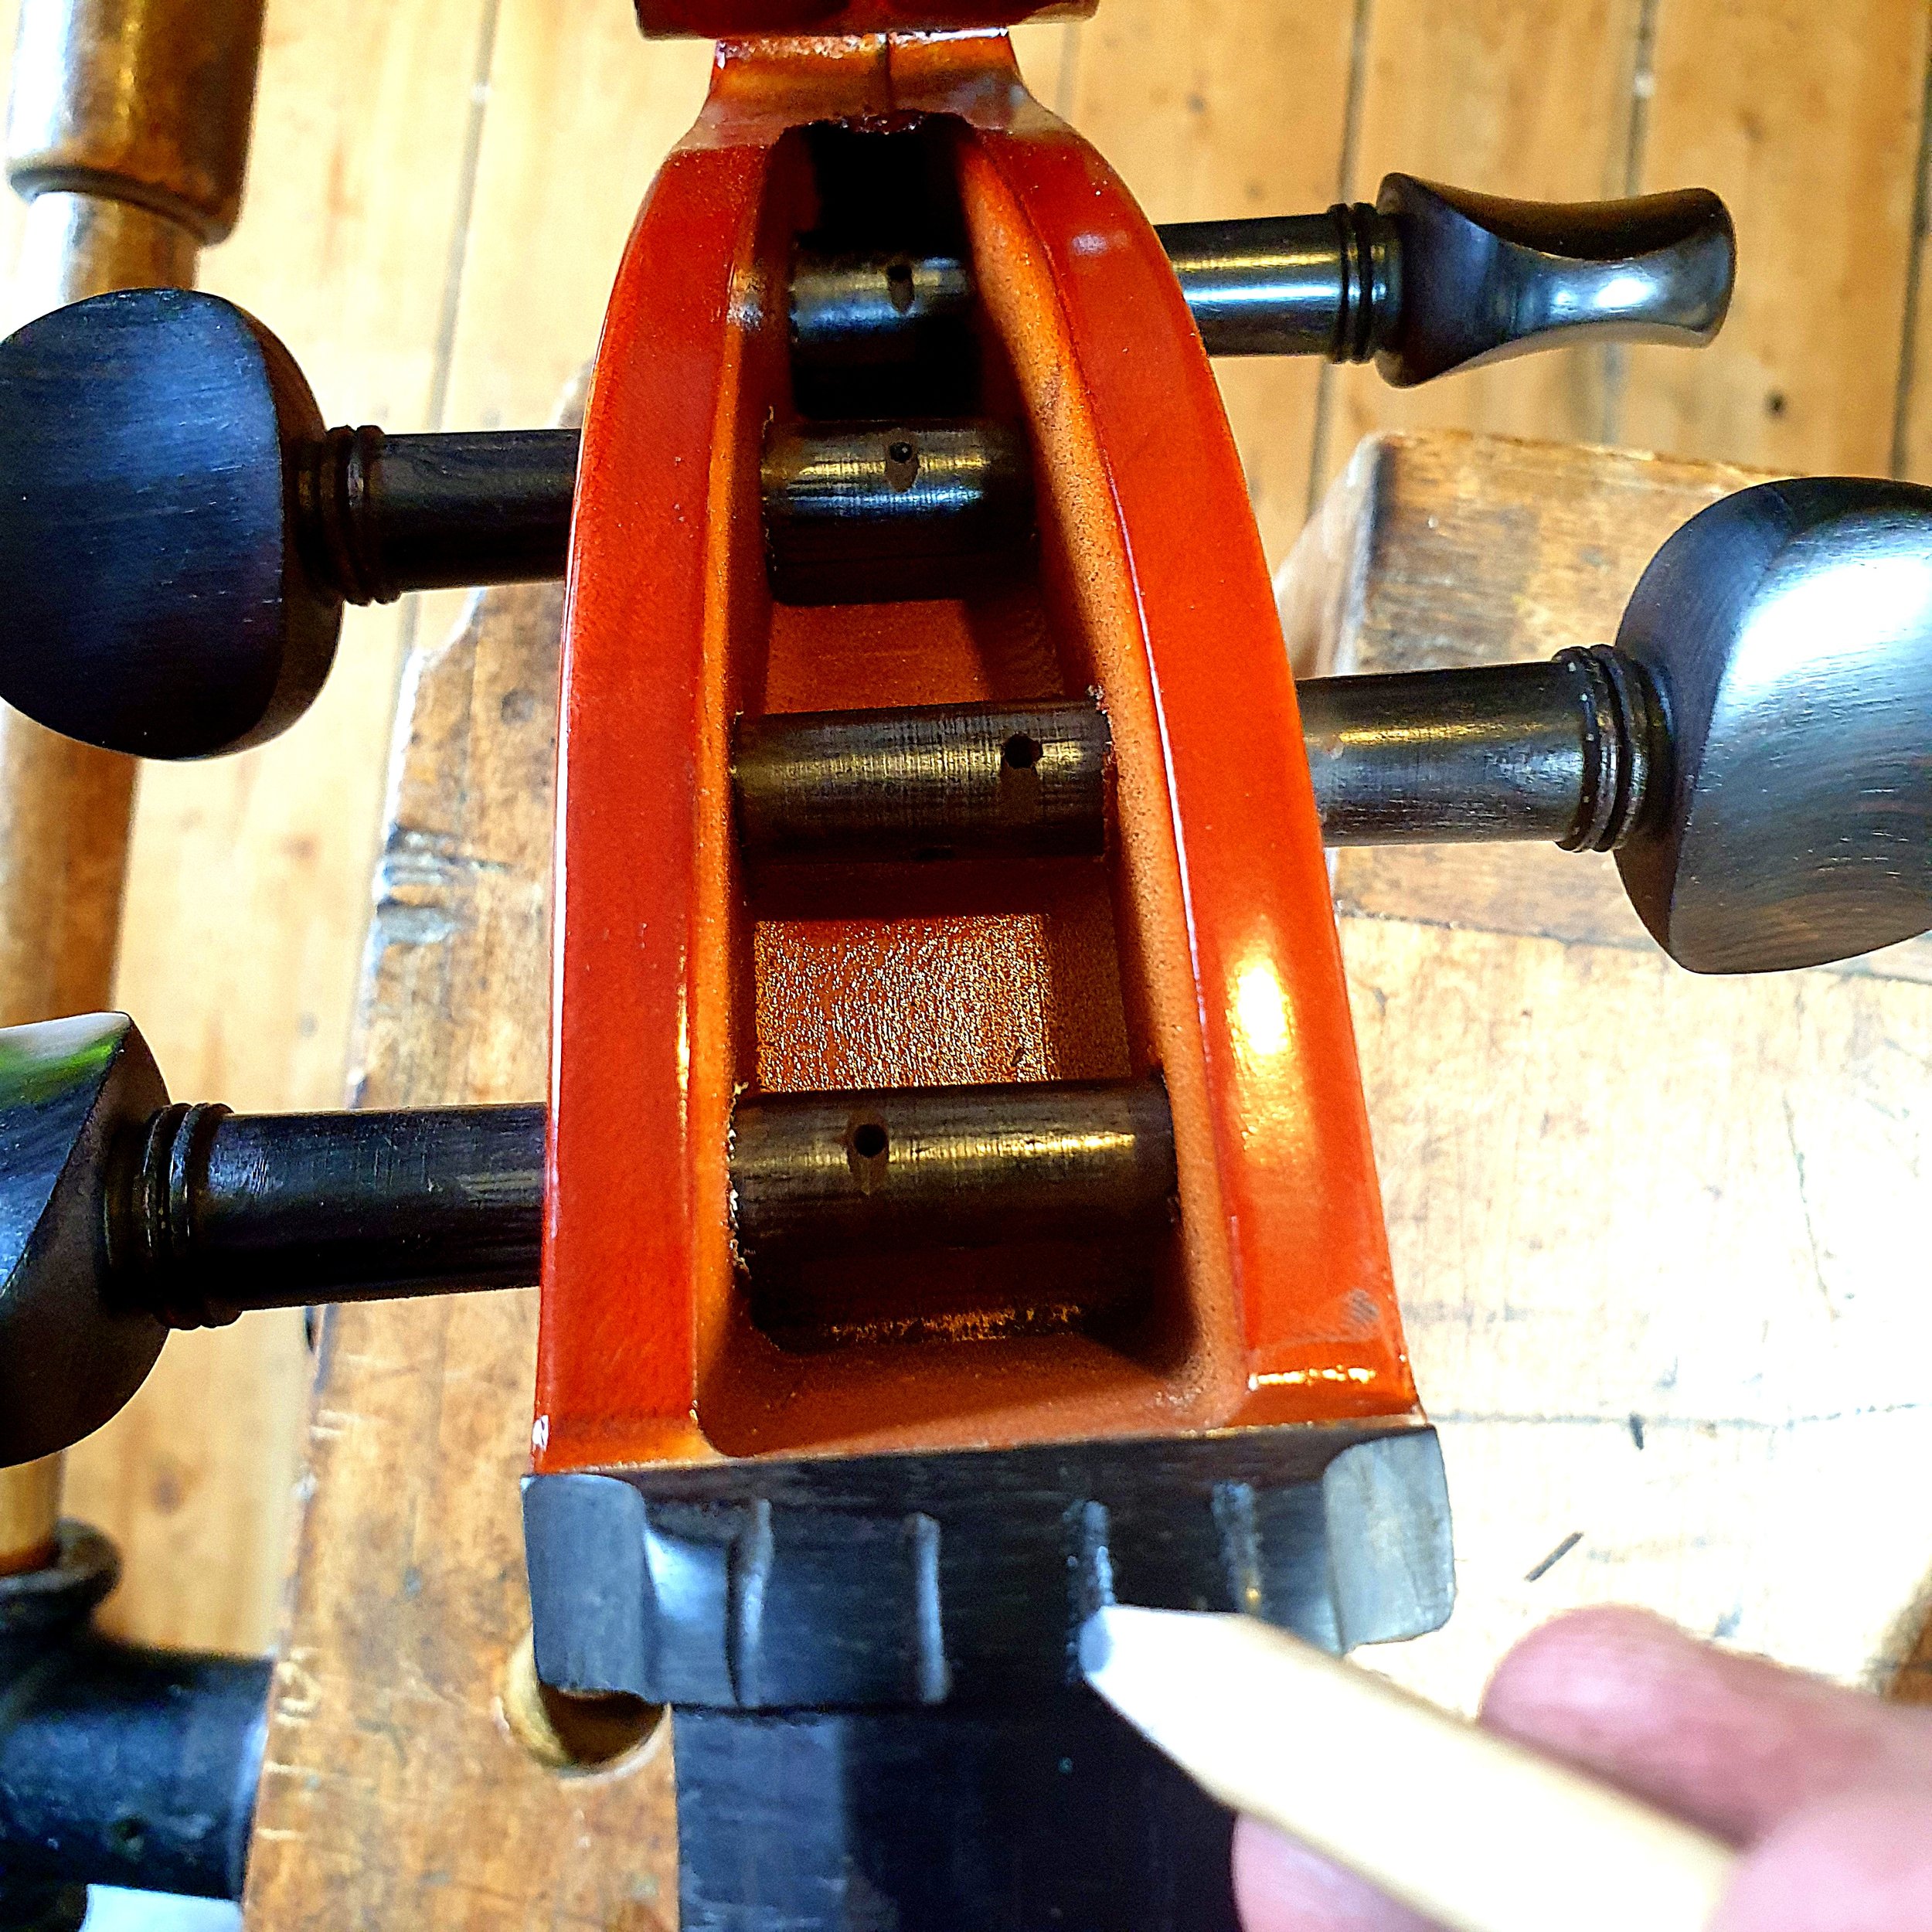
“Peg Paste”
If you have a ‘lipstick’ of special peg paste kicking around in your instrument case, it is useful to apply a little around the peg on the areas where it touches the peg box of the instrument.
Rotate it a few times inside the peg box to disperse the paste evenly.
Repeat once or twice more if necessary.

“Why should I bother?”
As the pegs move against the wood, there are always little parts that fall out. Over time, not a lot of peg paste will be left in between the peg and the box walls.
The result is a dry running peg, which can get loose and doesn’t hold its pitch, or a stuck peg that doesn’t want to budge to tune the string. (If you find the peg is slipping under the string tension later, add a bit of chalk to the peg in the same manner).
If you need some peg paste,
you can get it here
“Places! Ready? Set?...”
When replacing one string on a violin, I find it most comfortable to sit down, put the chinrest end against my torso and put the back on my upper legs. When I first string up an instrument on the bench I have it in a raised cradle (to keep the back flat and the scroll suspended above the table worktop). This way, the instrument is usually sideways facing me with the scroll to my left and the tailpiece to my right. When the strings are in place and need tensioning up to pitch and I need two hands in the scroll area, I do put the violin on my lap, or in case of a cello, it will be standing on the floor facing me, whilst I sit down.
“… Go!”
The ball end of the string goes into the tailpiece. Whilst keeping a little ‘pull’ on the string to keep the ball in the tailpiece, the pointy end is going into the string hole on the peg and through it out of the other end to about 5-10mm (not more). If you have any trouble feeding the string through the peg, you can use a DIY-style set of tweezers to push the string through from one end or pull from the other end. Especially on the pegs closest to the scroll space is tight and feeding a string through the peg can get a bit finicky. Do take care not to scratch the varnish anywhere when using them. When turning always turn the peg AWAY from you. That way the string flows from the topnut nicely over and around the peg without any sudden bends.

“Designed to work
with you”
The pegs are positioned so that it is easiest to start with the lowest peg first, then you lay the next string on top of, over and above the previous one.
If you’re changing the G-string on a violin (C-string for viola and cello), but not changing the D-string on a violin (G-string for viola and cello) above, it can be a good idea to loosen the D-string (G-string) a little, so you can move it aside slightly to make life a bit easier.
Keep checking the tailpiece to see if the ball end still sits in between the prongs of the tailpiece holder.

When turning the peg at first, keep the string quite loose. Otherwise you’ll pull it out of the string positioning hole.
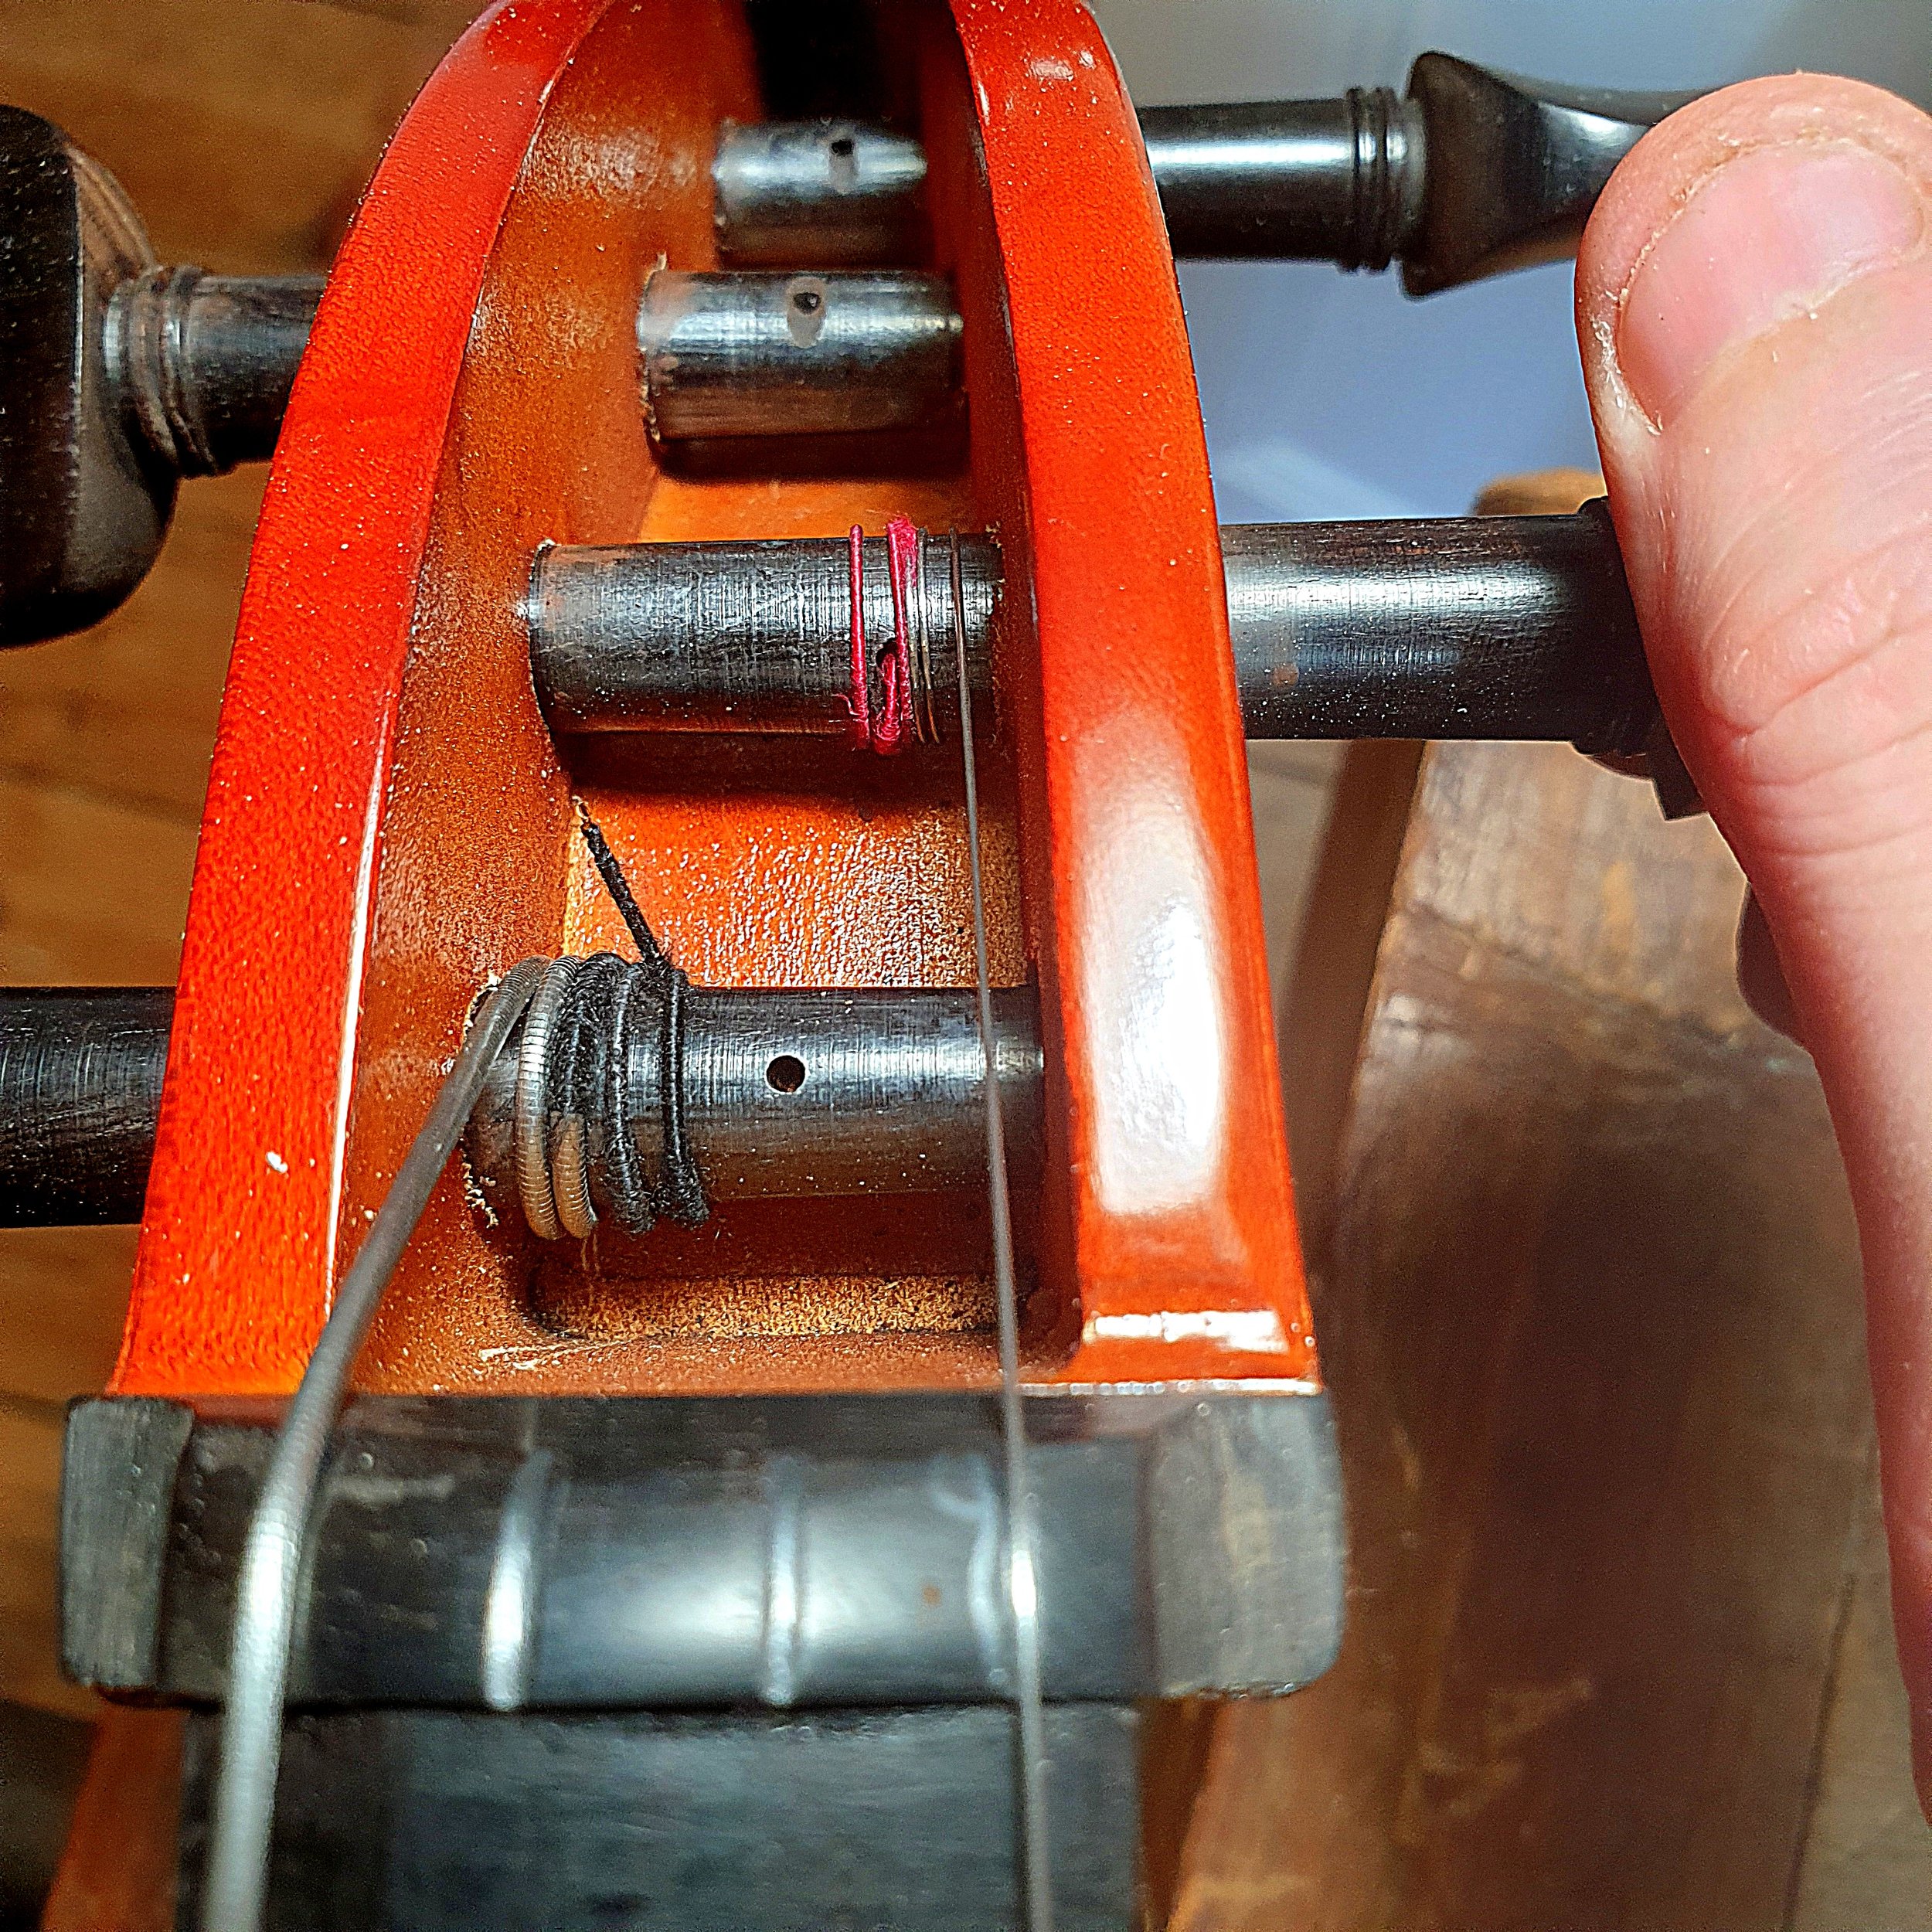
To keep the string firmly tied to the peg, turn the string one full turn towards the middle of the peg.


Then in the next half turn, take the string in your hand across and over to the other side of the end sticking out.
This binds the coiled string under another layer like a sailor tying a clove hitch knot.
Now you can pull a little tighter on the peg string. Going forward, do check you have enough clearance between the peg and any other surface.


To continue, just keep turning the peg and follow the string coil neatly and tidily along. If your pegs have worn through a bit and the string positioning holes are a bit further away from the groove in the nut, you can make a strong sideways move with the string in your hand. Keep turning and make sure the string flows from the topnut onto the peg as straight as possible.

For the first two strings this means they may almost or completely touch the peg box walls on the inside. This is totally fine.
Keep checking the tailpiece and the string grooves on the bridge and topnut to see if the string is where it is supposed to be. Turn the peg up and push inwards a little – just like steering on a vintage classic car, pegs don’t have power steering and won’t push in unless they are rotating.


“Right. Cool. I’ve got this. What’s next?”
It is fine to leave the new string tensioned up, but below ‘concert pitch’ until you have worked your way around and installed all the strings you need to replace. Tune them up once they are all there.
Just be aware that new strings need to adjust when they are first being used so they will stretch.
This means you go round and round to tune them up to pitch for a few times.
The fast way is to work your way around every new string about 3 times, then leave the instrument alone overnight.
Strings manufacturers advise against tensioning the strings to a higher pitch than they have been designed to do. However in the Old-Timey Folk music scene it is often so that strings are tuned up a lot, so leaving the strings a semitone over their designed pitch on their first night should be safe to do if they are new. Any more and the string’s core could get damaged.
“If you want to support others
you have to stay upright yourself.” (Peter Høeg)

One more thing before I’ll leave you to your own devices to experiment:
When tuning up, keep checking the bridge as a pull on the strings from the scroll-end most definitely will pull the bridge forward. The bridge stands upright correctly when the back (the side facing the tailpiece) is at 90 degrees with the top plate and the feet are touching all around – no gaps. If you find that the feet are touching all around, but the bridge is leaning, do get in touch with your local luthier to see what can be done. In some cases the bridge can be bent back straight, but in extreme leans, you might have to invest in a new customised fitted and adjusted bridge.
And that is a job best left to the experts.
“Straightening bridges like a pro”
If you find that the bridge is leaning a bit, just sit down with the violin/viola in your lap (a cello can be placed on the floor/table on its gigbag, or in its case, or on a bed) with the chinrest pressed to your torso. Position your hands sideways on the instrument for anchoring support (DON’T PRESS down too hard).
Gently place as many fingers as you can on the full front of the bridge and your thumbs on the back
(Celli can put one full palm on the front and the second hand forked through the strings from the top).
Now gently rotate your hands (for celli slowly pull) towards you to pull the bridge back up.
Check the instrument from the side to check the bridge angle and check that the feet are touching the top plate all over from the front and back – no dark lined gaps allowed.
Reposition your hands on the bridge to re-adjust if necessary.
Re-tune to concert pitch, re-check the bridge and you’re done!